
 https://www.pexels.com/photo/brown-leather-backpack-on-a-grassfield-3155047/
Leather goods have a way of never going out of style. A well-made bag, backpack, belt, or jacket doesn’t just serve a purpose — it becomes part of your everyday look. The beauty of leather is that it ages gracefully, often looking even better the longer you own it.
But capturing that beauty in a photo isn’t always easy. A quick snapshot usually can’t show the depth of the texture, the richness of the color, or the craftsmanship in every stitch. That’s where leather photography comes in. In this guide, we’ll walk through practical tips to help you showcase your leather pieces in the best possible light, whether you’re shooting for an online shop, a brand catalog, or just your own creative project.
Tip #1: Prepare Thoroughly
Preparation is key before you even touch your camera. Start by sorting your products by size and texture. Smooth leather and suede require very different lighting. Suede reflects light diffusely, which makes it forgiving under most conditions. Smooth leather, on the other hand, produces direct reflections that can overpower your image if not controlled. The challenge is to capture both the natural shine of the leather and its surface texture at the same time.
Set up your shooting surface with care. A black velvet cloth works especially well as a backdrop, since it absorbs light and creates a professional contrast. But velvet attracts lint, dust, and even the tiniest debris you might not notice with the naked eye. Always clean it with a lint roller before shooting. Otherwise, every speck of dust will become visible under flash or studio lights.
Finally, inspect each product carefully. If you notice dust or fibers on the surface, gently remove them with a soft brush. Beginners often skip this step, but professionals never do. If you’ve ever asked yourself What is a commercial photographer, one answer is someone who understands that preparation is just as important as the camera itself. Taking the time to do this will save you hours of unnecessary retouching in Photoshop later.
Tip #2: Improve the Look of Your Leather Goods
No matter how skilled you are with lighting or camera settings, your photos will never look professional if the products themselves aren’t presented at their best. Before photographing leather goods, take the time to enhance their appearance.
For example, shoes should be polished with a high-quality cream or wax to bring out their natural shine and richness. This not only makes them look new but also highlights the depth of the leather when light hits the surface. Bags and backpacks can be gently conditioned to remove scuffs and restore flexibility. Belts and wallets may benefit from a quick wipe with a damp cloth to eliminate fingerprints or dust.
By preparing your products this way, you reduce the amount of editing needed afterward and ensure that your images truly reflect the craftsmanship of the leather. Clean, polished goods create a positive impression and show potential buyers exactly how beautiful the item can look in everyday use.
Tip #3: Choose the Right Equipment and Camera Settings
Good preparation won’t matter without the right gear and settings. The quality of your photos depends heavily on how you configure your camera.
- Camera Settings: Use a shutter speed of 1/160s and an aperture of f/16. This combination provides greater depth of field, ensuring both the edges and the fine details of your product remain sharp.
- Tripod: Always use a tripod to avoid motion blur and to keep your compositions consistent, especially if you’re photographing multiple products.
- Lens: A macro or 50mm prime lens is ideal for capturing texture and detail. Wide lenses may distort proportions, which isn’t suitable for product photography.
- Lighting Equipment: Use softboxes or diffusers to soften harsh reflections. Leather surfaces can create unwanted glare, so controlling the light is crucial.
- Remote Trigger or Timer: Helps eliminate camera shake and ensures tack-sharp images.
Investing in even basic versions of these tools can make a huge difference in quality, while still keeping costs manageable.
Tip #4: Master the Lighting
Lighting can make or break leather photography. Since leather is reflective, you need to position lights carefully to highlight texture without creating distracting hotspots.
- For smooth leather, position your light source at a slight angle to emphasize shine without overwhelming the frame.
- For suede, softer and more diffused lighting works best. A large softbox or natural light through sheer curtains creates an even, flattering glow.
- Avoid overhead lights that flatten the product — side lighting reveals depth and detail more effectively.
- Experiment with reflectors (even DIY ones like white cardboard) to fill in shadows and balance the exposure.
By adjusting angles and intensity, you can bring out both the richness of the material and the craftsmanship in every stitch.
Tip #5: Pay Attention to Angles and Composition
The way you position your product and camera matters just as much as lighting. Experiment with different angles to highlight the uniqueness of each piece.
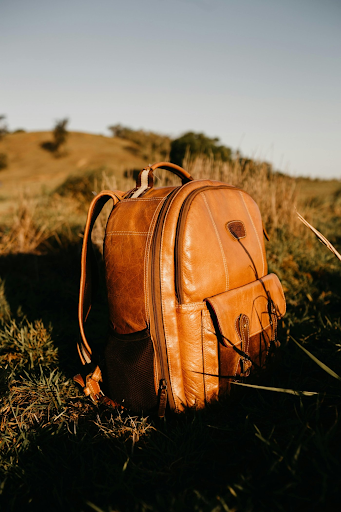
- For bags and backpacks, shoot at a three-quarter angle to show depth and structure.
- For belts and wallets, top-down shots capture detail while emphasizing shape.
- Use close-ups for texture, stitching, and hardware details like buckles or zippers.
Composition tricks such as the rule of thirds or symmetry help create visually appealing shots. Keep the background minimal to ensure the leather product is the star of the image.
Tip #6: Edit Smartly but Naturally
Post-processing is where your leather photos come to life, but restraint is key. Overediting can make leather look fake, stripping away its natural richness.
- Adjust contrast and clarity to bring out texture without over-sharpening.
- Fine-tune color balance to ensure the leather tone looks true to life — whether it’s deep brown, black, or tan.
- Use spot removal tools only for missed dust particles or blemishes.
- Keep the background clean, but don’t overexpose. The goal is to keep the focus on the leather, not on a blown-out backdrop.
Editing should enhance the qualities of leather, not replace them. Think of it as polishing the final product rather than reinventing it.
Final Thoughts
Leather photography is a unique form of art that allows you to showcase the beauty of your leather products. By preparing thoroughly, choosing the right equipment, mastering lighting, experimenting with angles, and editing thoughtfully, you can create photos that showcase leather goods at their very best.
Whether you’re photographing for a business or simply exploring your passion, these tips will help you translate the beauty and durability of leather into images that speak for themselves. High-quality leather deserves high-quality photography, and with the right approach, anyone can achieve it.